Step-by-Step: Check the Resolution (DPI) of a PDF File
- Adobe Acrobat Pro
- Photoshop
- Use the Pre-flight Tool
- Create a Checking Profile
- Run the Analysis
- Download the Image
- Verify in Photoshop
If you’ve ever needed to check the DPI (dots per inch) resolution of an image embedded in a PDF file, you know it can be tricky without knowing the steps. In this step-by-step guide, I’ll show you how to use Adobe Acrobat to check the DPI and verify it in Photoshop.
Run the Analysis: Adobe Acrobat Pro
Step 1: Open Your PDF in Adobe Acrobat
Start by opening your PDF in Adobe Acrobat Pro, the paid subscription version. Navigate to All Tools, then select Print Production.

Step 2: Access the Pre-flight Tool
In Adobe Acrobat, locate the left-hand menu and select Pre-flight.

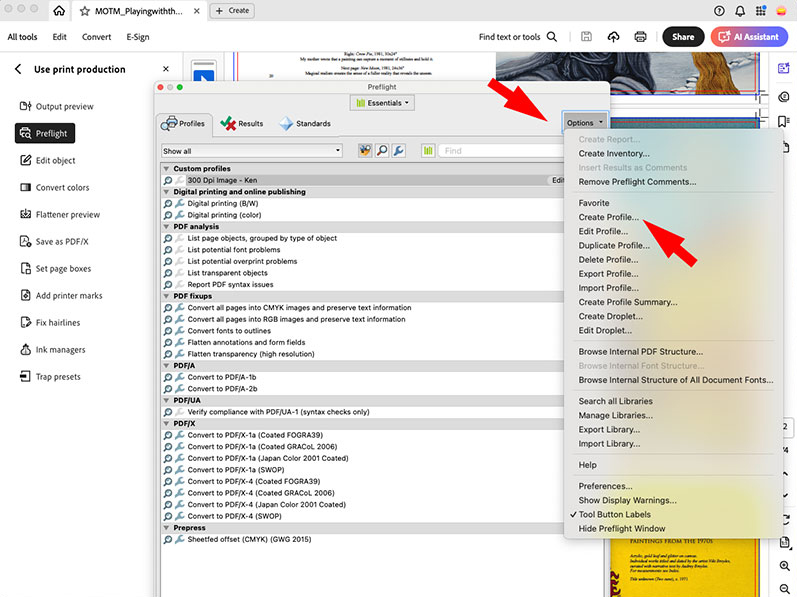
Step 3: Create a Custom Pre-flight Profile
The built-in Pre-flight tool in Adobe Acrobat contains many preset profiles. A profile defines the conditions for analyzing your file. In our case, we want to checking the image DPI in a batch, so we’ll create a simple profile for that purpose. Go to Options (right corner of the panel) and select Create Profile.
Step 4: Edit the Profile
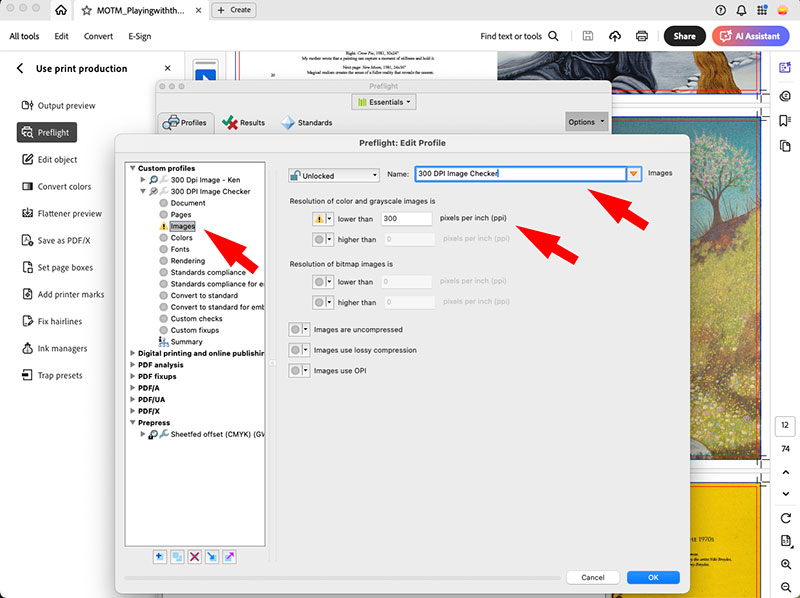
The profile allows you to set the criteria for analyzing your PDF. In this case, we want to check if any images are under 300 DPI. On the left-hand menu, select Images. Then, in the Resolution of color and grayscale images is section, set the condition to warning and specify resolutions lower than 300 DPI.
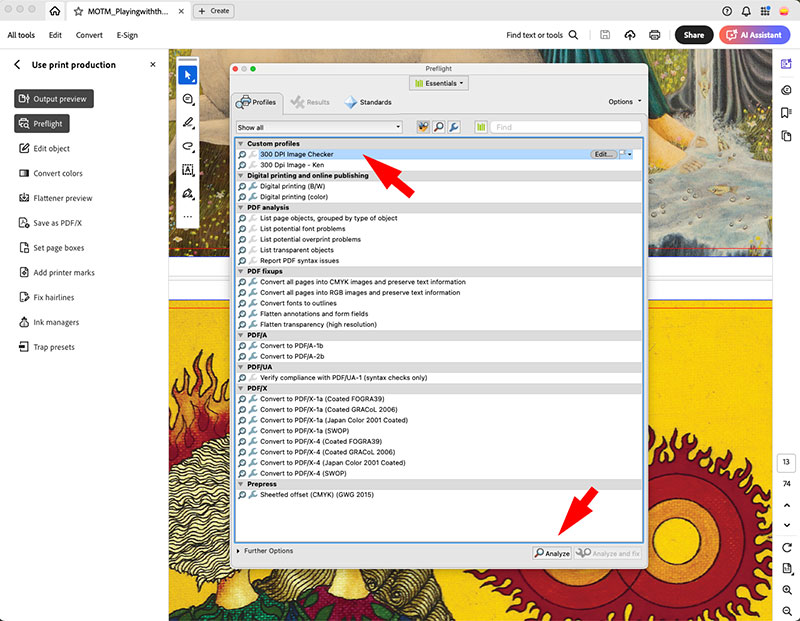
Step 5: Select the Profile and Run the Analysis
Once you’ve saved the profile, it will appear in the main Pre-flight panel. Select it and click Analyze to run the check.
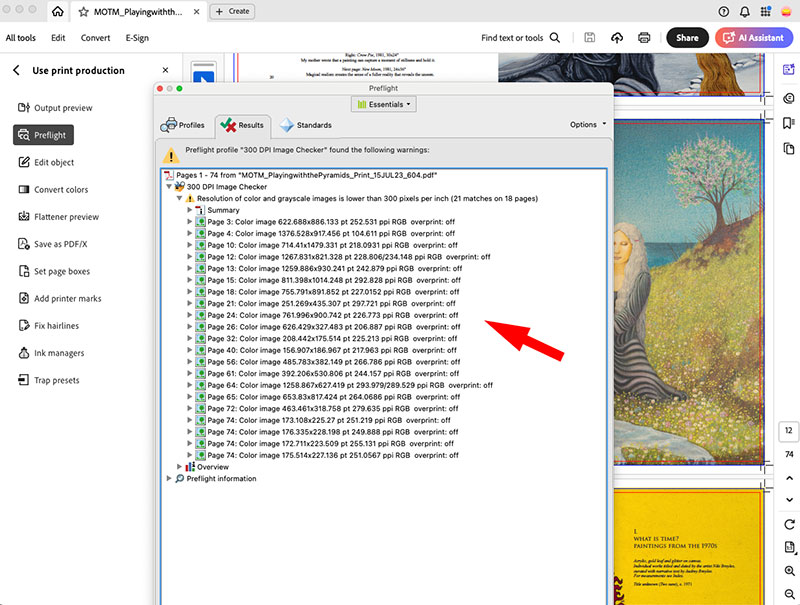
Step 6: Review the Pre-flight Results
In the Pre-flight Results panel, the tool will display the analysis, flagging any images that meet your preset criteria (e.g., images with a resolution below 300 DPI).
Verify in Photoshop
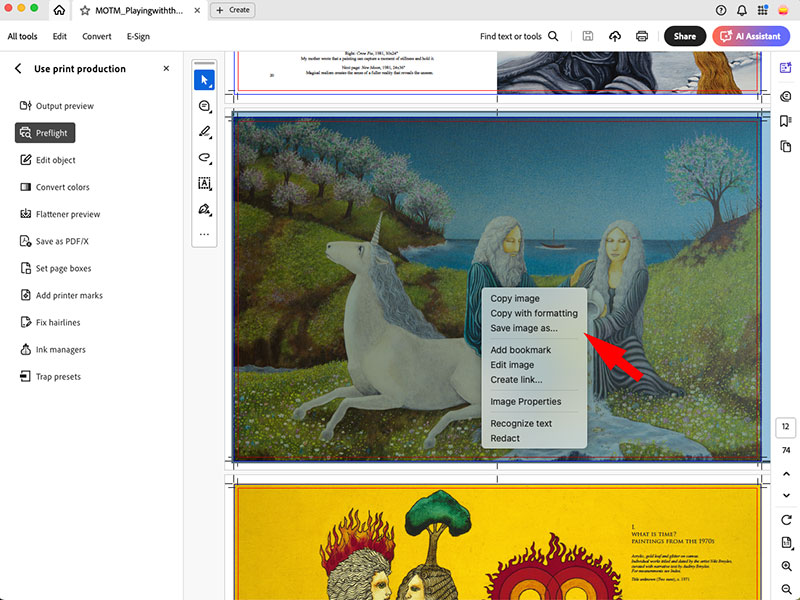
Step 7: Locate and Download the Image
In the Pre-flight Results panel from the previous step, click Show to navigate to the specific image in the PDF. Then, right-click the image, select Save image as, and download it to your computer.
Step 8: Open in Photoshop and Verify the Resolution
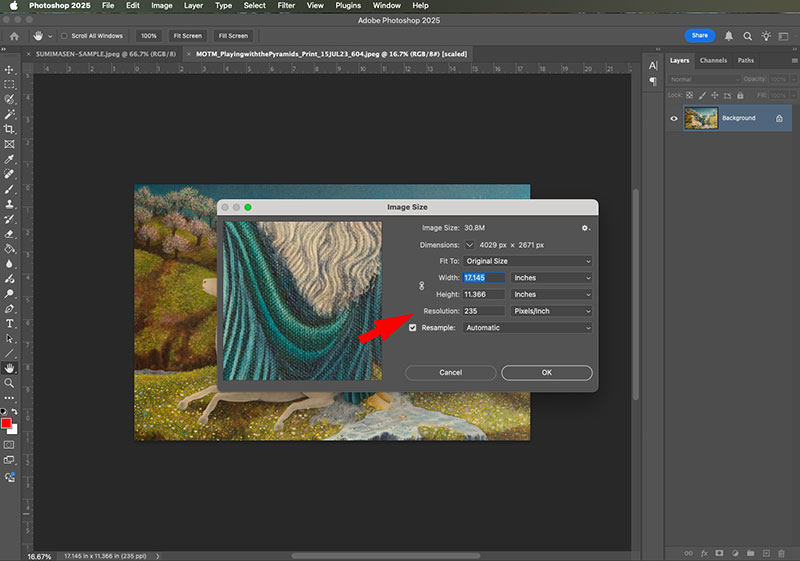
Open the downloaded image in Photoshop, then go to Image > Image Size to see the resolution in DPI.

Step 9: Confirm the DPI
