How to Arrange Pages for Booklet Printing
You’re ready to make a booklet or a DIY zine project, it is small, maybe just 10 pages. You plan to print it at home, fold the pages in half, and staple them together. But how do you arrange the pages?
There are two ways to arrange the pages, automatically and manually.
Option 1: Arrange the Pages Automatically
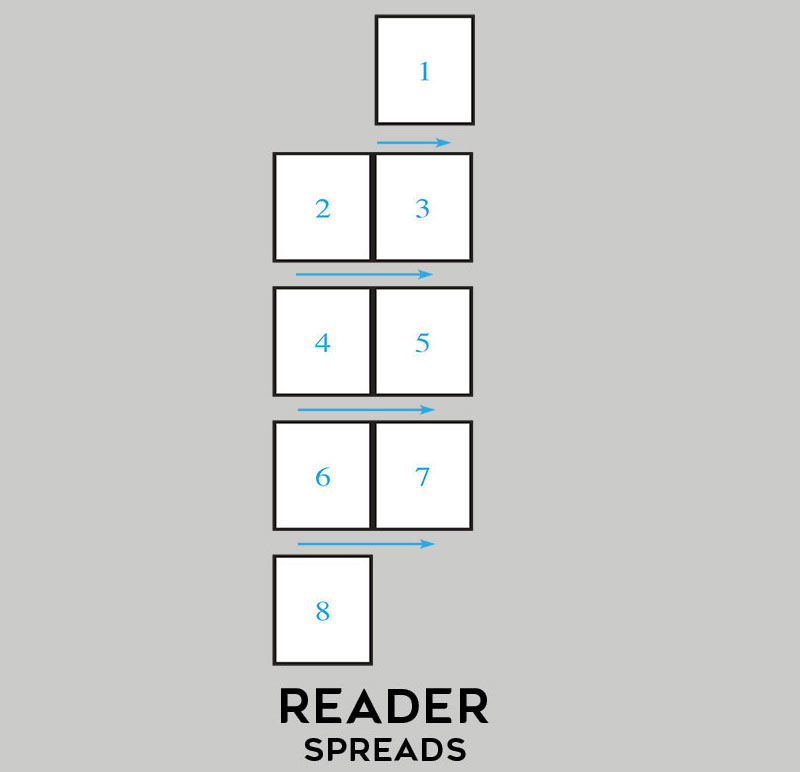
Arrange the Pages in Reader Spreads
Many software, such as Adobe Acrobat or PDF Booklet, can handle the arrangement automatically. You use the same file you would send to a professional printer.
Important:
Keep total pages divisible by 4 - A sheet of paper folded in half creates four pages. This is why the total page count must be divisible by 4. If there aren’t enough content pages, you can add blank (filler) pages at the beginning or end.
 Download a Saddle Stitch Booklet File
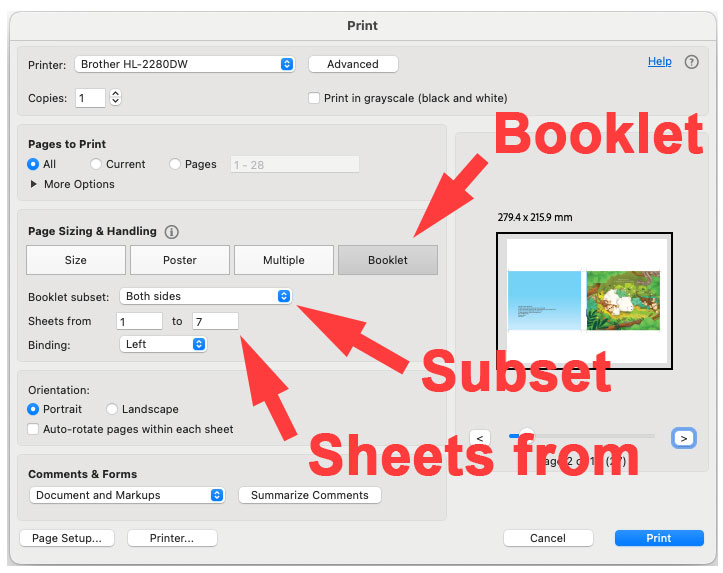
Printing the Booklet with Adobe Acrobat
In this example, we’re using Adobe Acrobat to print a booklet on a home printer. Keep two things in mind:
Page Count - Your total booklet page count must be divisible by 4, or the page order will get messed up.
Bleed - Eliminating bleed in Adobe Acrobat can be tricky. A simple fix is to export your file without bleed and trim the booklet a bit smaller afterward.

Understanding the Setting
- Page Sizing & Handling: Choose "Booklet" to set up booklet printing and have the pages arranged automatically.
- Booklet Subset: This controls which side of the page prints. If your printer supports two-sided printing, pick "Both Sides." If not, start with "Front Side Only," flip the pages manually, then print "Back Side Only."
- Sheets From: For a stapled booklet, use the full range from the first page to the last. For books with multiple signature stacks, this setting splits the pages. For example, a 40-page booklet with two signature stacks can be divided into 1-20 and 21-40, printed as two separate batches.
Option 2: Arrange the Pages Manually
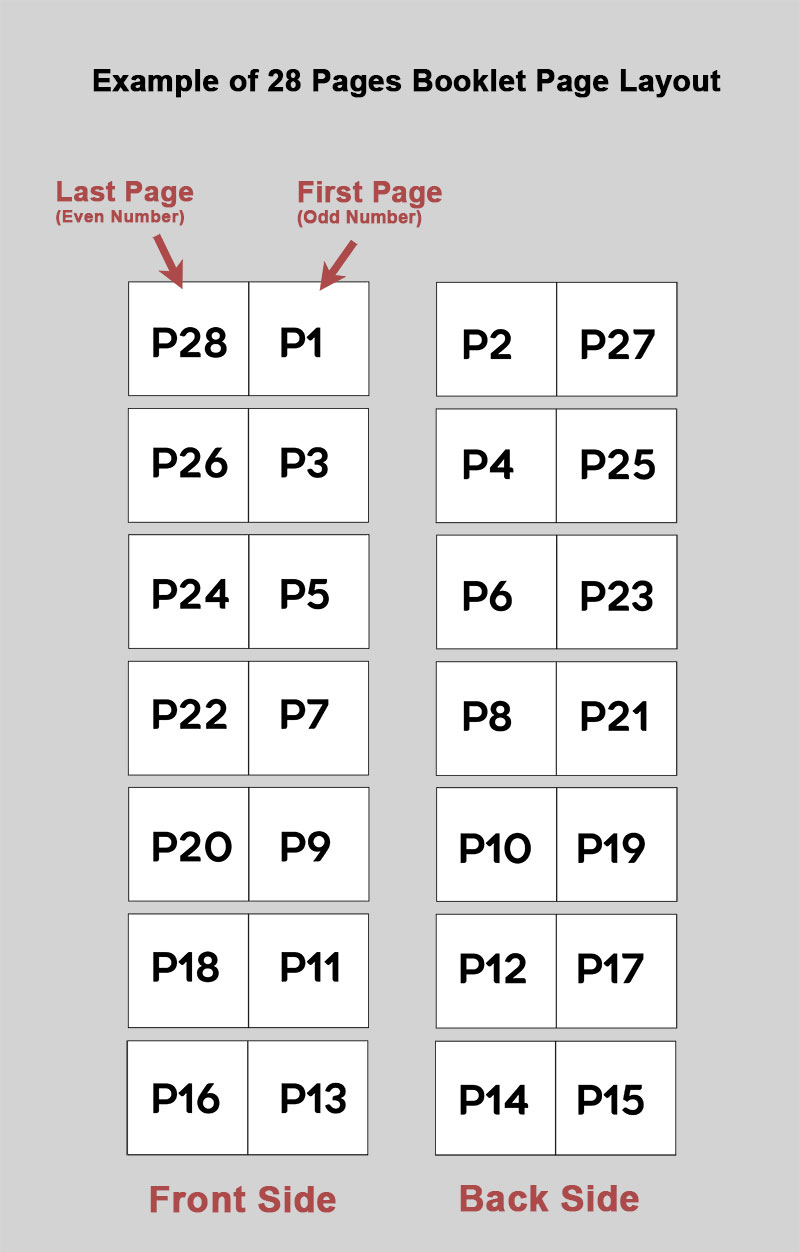
If you want to manually arrange the pages of your booklet, it’s also straightforward. The front side will be arranged with an even-odd page layout, and the back side will be arranged with an odd-even page layout.
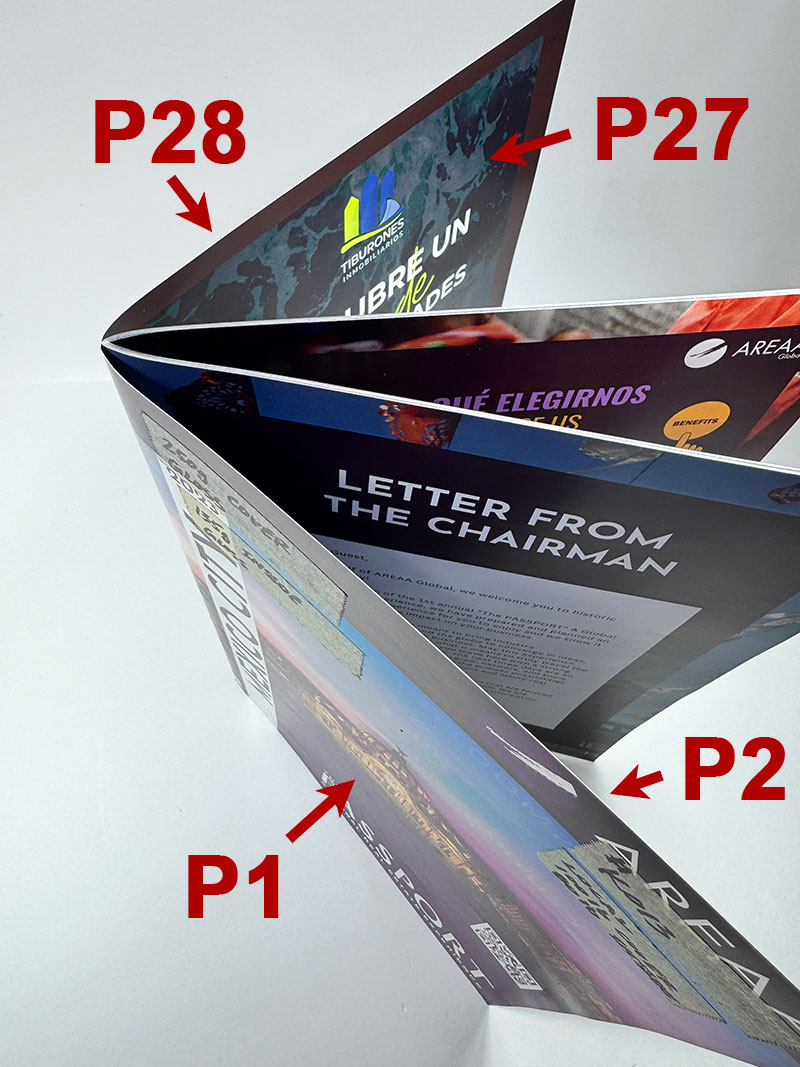
For example, in a 28-page booklet, place page 28 (the last page) next to page 1 on the front side of the sheet. On the back side, place page 2 next to page 27. After printing the front side, flip the paper and print the back side to complete the sheet.
Repeat this pattern for the remaining pages, pairing the next outer and inner pages (e.g., page 26 next to page 3 on the front, page 4 next to page 25 on the back) for each sheet until all pages are arranged.


